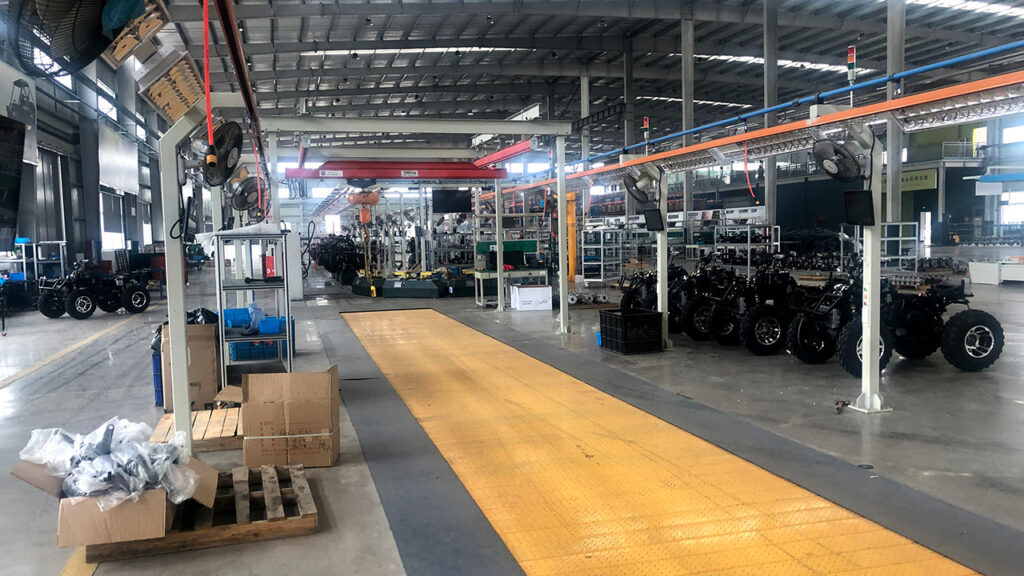
What does the main assembly line for ATVs include?—ATV Final Assembly Line
The main assembly line for ATVs (All-Terrain Vehicles) is the core and most visible part of the entire production process. It assembles the frame, body panels manufactured in previous steps, and thousands of purchased components into a complete vehicle.
The ATV main assembly line is primarily a sequential, multi-station, flow-oriented operation system, typically including the following main parts and processes:
Part 1: Main Components of the Assembly Line
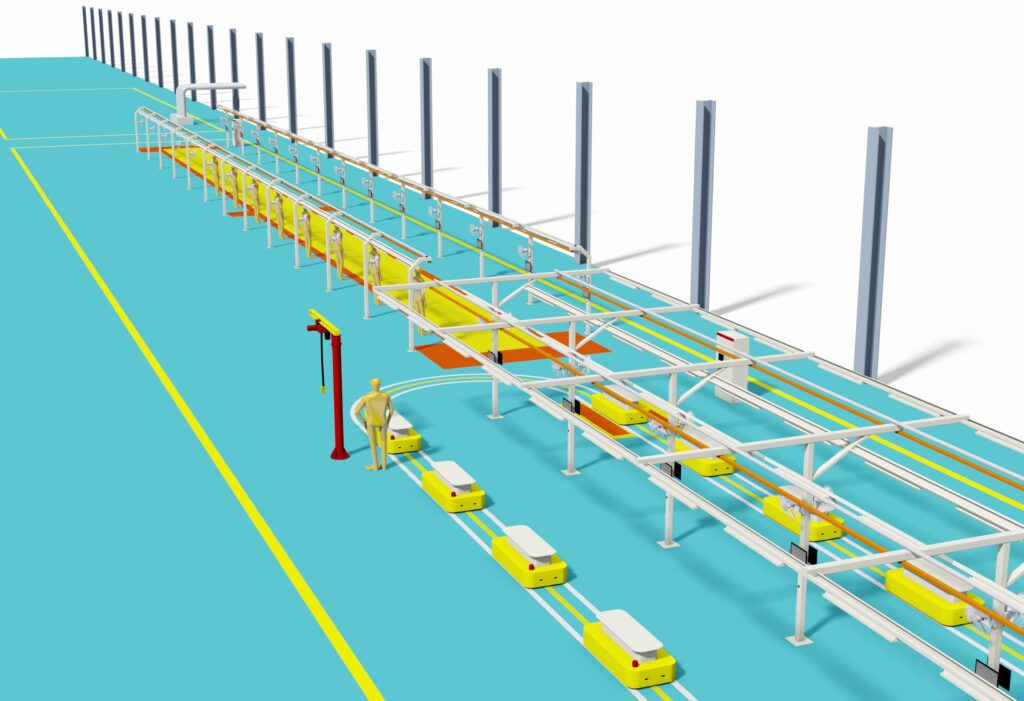
- Conveyor System
- Types: Typically uses floor-mounted conveyor chains, slat conveyors, or friction roller conveyors. Modern factories may use AGVs/RGVs as mobile assembly platforms for greater flexibility.
- Function: Carries the frame or chassis, moving slowly at a constant speed past each assembly station.
- Line-side Material Supply System
- Types: Includes material racks, bins, special carts, and small shelving units.
- Function: Precisely delivers the required parts to each station based on its assembly tasks, facilitating easy access for workers, reducing time spent searching and moving, and improving efficiency. This is usually managed by a logistics team according to the production cycle time.
- Tools and Equipment
- Pneumatic/Electric Tools: Extensive use of torque wrenches, screwdrivers, etc., to ensure consistent and standard tightening force for critical fasteners.
- Balancing Hoists / Assist Arms: Used for installing heavier components like engines, tire assemblies, etc., to reduce worker physical strain.
- Filling Equipment: Specialized, quantitative filling machines for adding engine oil, brake fluid, coolant.
- Testing Equipment: Devices used for online inspection, such as electrical function testers, toe adjustment gauges.
Part 2: Core Process Flow of the Assembly Line (Sequential by Station)
The assembly line generally starts with the frame being placed on the line and ends with a fully functional vehicle driving off the line. Here is the typical station sequence:
Stage 1: Chassis and Powertrain Pre-assembly
- Station 1: Frame Loading and Positioning
- The painted frame is hoisted onto the conveyor line and secured in position.
- Station 2: Wiring Harness and Pipeline Installation
- Install the main vehicle wiring harness, securing connectors for various sensors and actuators.
- Route and install brake lines, fuel lines, vacuum hoses, etc.
- Station 3: Suspension System Installation
- Install front/rear shock absorbers, upper/lower A-arms (wishbones), tie rods, etc.
- Station 4: Powertrain Marriage
- This is a critical station. Using a balancing hoist, the engine + transmission assembly is lifted and joined/mated with the frame and rear axle, securing all connection points.
- Station 5: Drivetrain and Brake System Installation
- Install the drive shaft/chain, rear axle differential.
- Install brake calipers, brake discs/rotors.
Stage 2: Body and Control System Installation
- Station 6: Fuel Tank and Exhaust System Installation
- Install the fuel tank, exhaust pipe, and muffler.
- Station 7: Steering System and Handlebar Installation
- Install the steering stem, handlebars, throttle grip, brake levers, clutch lever, and all control cables.
- Station 8: Dashboard and Electrical Components Installation
- Install the instrument panel, various switches, headlights, taillights, and connect the wiring harnesses.
- Station 9: Wheel Assembly Installation
- Mount the pre-assembled wheel and tire assemblies onto the vehicle and fasten the nuts using torque wrenches.
Stage 3: Interior/Exterior Trims and Final Adjustments
- Station 10: Fluid Refilling
- Use specialized equipment to quantitatively refill engine oil, gear oil, coolant, and brake fluid.
- Station 11: Exterior Parts Installation
- Install front/rear bumpers, fenders, seats, side panels, and all plastic covers.
- Station 12: Final Inspection and Adjustment
- Electrical Check: Verify all lights, horn, and instrument displays function correctly.
- Brake Test: Check brake functionality, bleed the system if necessary.
- Wheel Alignment: Adjust the toe-in/toe-out to ensure driving stability.
- Engine Start-up: Add a small amount of fuel, start the engine for the first time, check for abnormal noises or leaks.
- Road Test Simulation: Simulate driving on a roller dynamometer, testing gear shifts, acceleration, and braking performance.
After passing all inspections, the ATV officially rolls off the production line and is sent to the finished product warehouse, ready for shipment.
In summary, the ATV main assembly line is a highly organized “birthplace of the vehicle.” Through scientific material supply, precise station division, and strict quality control, it efficiently and accurately combines countless parts into a fun-filled ATV.


